I’ve been hearing about Let’s Encrypt for several months now as an up and coming replacement for standard SSL Certificates from vendors like Comodo, Thawte, GeoTrust and the like. To be honest, at first glance I was not impressed. Let’s Encrypt certificates only have a lifetime of 90 days, and a simple Comodo cert can be had at SSLs.com for $15 for 3 years. So why go through the hassle?
Then I Talked to LiquidWeb
I’m a huge fan of LiquidWeb. They are hands down the best web host I’ve worked with since I started developing websites in 1995. And, as usual, their tech support team came through with the right answers and a simple process for setting up Let’s Encrypt on my VPS.
Setting up AutoSSL in WHM
In just a couple of minutes, LiquidWeb support had AutoSSL set up in my VPS’s WHM. And they added a cron job so that the certs would autorenew every 90 days with zero work for me.
Running AutoSSL

Once AutoSSL is set up, you have to do a few things to get Let’s Encrypt working on your server. See the screenshot above for the details.
Moving a WordPress Site to SSL
In most cases, moving a WordPress site to SSL is a pretty simple process. Following the steps below will be all you need to do in many cases.
1. Change the WordPress Site URL

Go to Settings > General and change the WordPress Address and Site Address from http to https. You’re probably going to get logged out a couple of times during this process as the site goes into SSL. That’s totally normal.
2. Force the Site into SSL
The easiest way to do this is by installing and activating the WP Force SSL plugin. Other Plugins like iThemes Security Pro also offer a force SSL function. Or you can force SSL via your .htaccess file.
3. Search and Replace in your Database
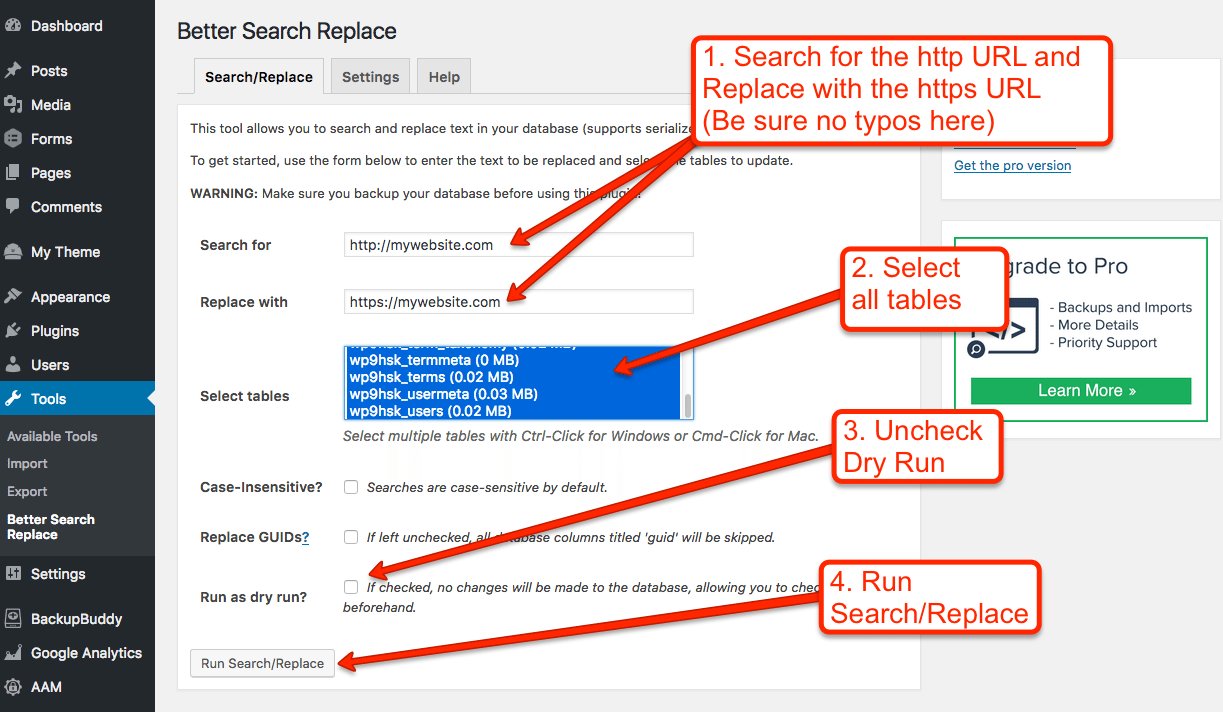
The last step in the process is to update all the instances of the http version of your domain in your database, which will be found in internal links, images, and other media. To do this, install and activate the Better Search Replace plugin and follow the instructions in the screenshot below.
4. Test your Content
Visit your home page and see whether or not you have a green padlock in the address area. If you don’t, that means that some of the content on the page is coming in via http rather than https. Here are some common cuplrits:
- Google Font @import statements in your CSS file
- Contents of text widgets
- Raw HTML areas in page builders
- Poorly coded social media plugins
You can often find the issue by right clicking, selecting View Source to view the HTML from the page, and searching for http://. Anything coming in via http rather than https will cause you not to get a green padlock. Each instance will need to be fixed.
You might also try the excellent Why No Padlock? tool.
5. Test your SSL Certificate
To make sure everything is working properly with your new SSL certificate, go to the SSL Server Test, enter your URL and wait while this free tool gives your SSL certificate a thorough check. If you get bad results, talk to your web host and ask for assistance.